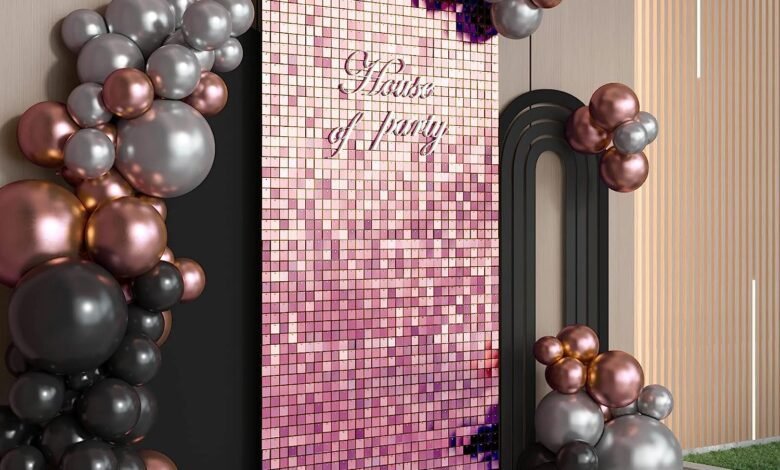
A shimmer wall backdrop is the ultimate statement piece for any event. Its glittering, reflective surface catches the light beautifully, instantly elevating the ambiance and creating a stunning focal point for photos. Whether it’s a wedding, birthday party, corporate event, or baby shower, a shimmer wall adds a touch of glamour and sophistication.
Building a shimmer wall backdrop may seem intimidating, but with the right tools and guidance, it’s a straightforward project that you can complete like a pro. Let’s dive into this step-by-step guide to creating your own dazzling shimmer wall backdrop.
Why Choose a Shimmer Wall?
Before we get started, here’s why shimmer walls are a must-have for events:
- Eye-Catching: The sparkling panels create an attention-grabbing feature that guests can’t resist.
- Perfect for Photos: It enhances the background of pictures, making every shot Instagram-worthy.
- Reusable: High-quality shimmer wall panels can be disassembled and reused for multiple events.
- Customizable: With various colors and configurations, you can tailor the design to match your event theme.
Check out Shimmer Wall for premium panels and accessories to get started.
Step 1: Gather Your Materials
Here’s everything you’ll need to build your shimmer wall backdrop:
- Shimmer Wall Panels: Choose panels in your desired color(s). Popular options include gold, silver, rose gold, and black for versatility.
- Backdrop Frame or Stand: A sturdy frame to support your panels.
- Zip Ties or Clips: To secure the panels to the frame.
- Measuring Tape: For precise measurements.
- Lighting (Optional): String lights or spotlights to enhance the shimmer effect.
Pro Tip: Purchase pre-made Shimmer Wall Backdrop Panels for easy installation and a professional finish.
Step 2: Choose the Perfect Location
Select a location that maximizes the impact of your shimmer wall:
- Indoor Events: Position the wall near natural light or under spotlights for extra sparkle.
- Outdoor Events: Place the backdrop in an area with good lighting, preferably shielded from strong winds.
Ensure there’s enough space for guests to stand in front of the wall for photos.
Step 3: Assemble the Backdrop Frame
Set up the frame or stand where you want the shimmer wall to be displayed.
- For Adjustable Frames: Extend the frame to match the desired size of your backdrop.
- For Fixed Stands: Use clamps or weights to secure the stand and prevent wobbling.
Pro Tip: If you’re working with a larger space, consider using multiple frames and connecting them to create a seamless backdrop.
Step 4: Attach the Shimmer Wall Panels
Now it’s time to bring your backdrop to life:
- Start from the Bottom: Attach the first row of panels to the frame using zip ties or clips. Secure each panel tightly to avoid sagging.
- Work Your Way Up: Add rows of panels above the first, ensuring the edges align for a seamless look.
- Overlap for Texture: Slightly overlapping the panels can add depth and enhance the shimmer effect.
The Shimmer Wall Backdrop Panels from House of Party are designed to snap together easily, simplifying this step.
Step 5: Customize the Design
Make your shimmer wall unique by incorporating creative elements:
- Color Blocks: Use panels in different colors to create patterns like stripes, ombre gradients, or even custom shapes.
- Logos or Signs: Add a neon or wooden sign with the event name or hashtag.
- Floral Accents: Attach faux flowers or greenery for a softer, romantic look.
These touches personalize the backdrop and make it even more special.
Step 6: Enhance with Lighting
Lighting is the key to making your shimmer wall pop. Here’s how to do it:
- String Lights: Drape fairy lights around the frame for a twinkling effect.
- Spotlights: Use directional lights to highlight the shimmer panels and maximize their reflective quality.
- Colored Lights: Add LED lights in your event’s theme colors for extra flair.
Lighting transforms your shimmer wall into a mesmerizing centerpiece, especially for evening events.
Step 7: Secure and Test
Before the event begins, double-check that your shimmer wall is secure:
- Tug gently on the panels to ensure they’re attached firmly.
- Test the stability of the frame to avoid any mishaps during the event.
Take a few test photos from different angles to confirm that the lighting and design look flawless on camera.
Step 8: Use It as a Backdrop
Once your shimmer wall is complete, it’s time to put it to use! Here are some ways to make the most of your stunning creation:
- Photo Booth: Set up props like hats, glasses, and signs for guests to use while posing.
- Focal Point: Place the shimmer wall behind the dessert table or stage to draw attention.
- Ceremony Backdrop: For weddings or formal events, use it as the background for key moments like the vows or speeches.
Step 9: Clean Up and Store for Next Time
After the event, carefully disassemble the shimmer wall:
- Detach the panels and store them flat to prevent damage.
- Fold or collapse the frame for easy storage.
With durable Shimmer Wall Backdrop Panels, you can reuse your backdrop for future celebrations.
Tips for a Professional Finish
- Keep It Symmetrical: Align panels perfectly for a polished look.
- Mind the Edges: Cover any exposed edges of the frame with additional panels or decorative trims.
- Coordinate Decor: Match the shimmer wall’s color with the event’s theme for a cohesive aesthetic.
Final Thoughts
A shimmer wall backdrop is a dazzling addition to any event, combining elegance and fun in one stunning display. By following this guide, you can create a professional-looking shimmer wall that will wow your guests and make your photos unforgettable.
For high-quality panels and easy-to-assemble kits, explore the Shimmer Wall Backdrop Panels and let your creativity shine! With the right materials and a touch of imagination, your shimmer wall will be the talk of the party.
So, roll up your sleeves, grab your panels, and get ready to create a masterpiece that will sparkle in every shot!